Fiber Laser Cutting Machine Procedure – Pre-Startup Inspection and Operation Steps
Before starting the fiber laser cutting machine, it is essential to carry out a full inspection to ensure safe, stable, and efficient operation. The following are detailed pre-startup checks and operating procedures.
 Check the Gas System
1.Turn on the air compressor and confirm that it works properly.
2.Open all gas cylinders or tanks required for cutting. Check the outlet pressure gauge to ensure that the gas pressure and amount are normal. If not, adjust the pressure or replace the gas cylinder/tank.
3.Open all gas valves and check whether the entire gas circuit is smooth and leak-free.
4.Use the gas test function to check whether the output gas pressure is stable and within the normal range.
 Check the Water Cooling System
1.Turn on the chiller and make sure it is running normally.
2.Check the water level, inlet/outlet pressure, and set temperature of the chiller. If any of these do not meet the requirements, add cooling water and reset the pressure and temperature.
3.Inspect the water circulation to ensure it is smooth and there is no water leakage.
 Check the Lubrication System
Before the machine runs for the first time:
Check the lubrication oil level of the oil pump.
Ensure the guide rails and gears are well lubricated.
 Check the Power Supply
1.Turn on the main power switch, circuit breakers, and voltage stabilizer. Ensure all indicators show normal operation.
2.Once all hardware connections and inspections are completed, you can begin the startup process.
 Machine Startup Sequence
1.Turn on the chiller power, make sure it operates normally with no "low water" alarm, and wait until the temperature stabilizes around 25°C.
2.Turn on the main power switch of the machine.
3.Turn on the drive, chiller, and laser source power switches in sequence.
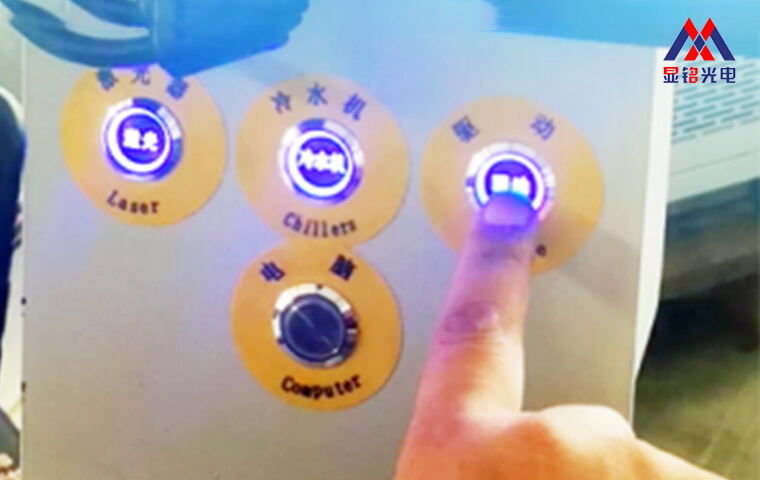
4.Start the laser cutter source:
Open the electrical cabinet, turn the laser key switch to "ON."
When the indicator lights show normal status, press the START button on the front panel.
5.Turn on the computer and wait for the system to load.
6.Launch the CypOne or CypCut software on the desktop.
7.Once the software opens, click "Return to Origin" to execute the homing operation.
8.The machine is now in standby mode.
 Initial Operation Check
1.Low-speed motion test: Move the machine at a low speed to check if all limit switches are working properly.
2.Speed test: Gradually increase the moving speed to ensure stable and smooth operation at all levels.
3.Function test: Check whether all control functions and commands are working correctly.
 First-Time Use or After Maintenance
1.Two-axis calibration:
If this is the first use or if any components of the cutting head or sheet metal have been replaced, perform a calibration.
In the software, go to View > BCS100 to open the interface.
Click the F1 button to enter the calibration menu (refer to the "BCS100 Calibration" section for details).
2.Optical path calibration (required after changing the nozzle):
Attach transparent tape to the nozzle. Turn on the red light and check if the beam passes through the nozzle center.
Open the shutter, set the pulse power to 10%, and click the Laser button for a test shot.
Remove the tape and check the position of the laser spot. If it is not centered, adjust the collimation mirror until it aligns perfectly.
3.Focus position adjustment:
Refer to the "Focus Adjustment" section to ensure accurate laser focusing.
 Gas Pressure Setting
For nitrogen (N₂): adjust the pressure to above 1.6 MPa.
For oxygen (O₂): adjust the pressure to around 0.5 MPa.
 Ready for Operation
After completing all the above steps, the Optical fiber cutting system are in normal working condition, and you can begin your cutting tasks safely and efficiently.
 Email: [email protected]
 WhatsApp/WeChat: +86 15314155887